Air API is Now Live
- Apr 9
- 2 min read
Updated: Apr 14
If you've ever tried serving an open-source AI model yourself, you know the pain. Setting up GPU infrastructure takes longer than choosing the model itself. Provisioning GPUs, configuring environments, scaling with traffic... the road to running a single model is way too long.
Air API eliminates that entire process. It's a serverless API service for open-source AI models. No infrastructure to build. Just an API key to get started.
Key Features
💡 OpenAI-Compatible Endpoint If you're already using the OpenAI API, just swap the endpoint URL. Almost no code changes required.
💡 Pay-Per-Token Pricing No monthly fixed fees. You only pay for the tokens you use.
💡 No Infrastructure Management GPU provisioning, model deployment, and scaling are all handled by AIEEV's distributed GPU infrastructure.
Launch Models
Air API currently supports 3 models from the Qwen series.
모델 가격 비교 표 한눈에 보기 > https://ap-1.aieev.cloud:3007/models
Model | Highlights | Recommended Use |
Qwen3.5-35B-A3B | MoE architecture. Only 3B of 35B params active. 262K context. | AI agents, coding assistants, long-document analysis |
Qwen3.5-9B | Dense model. Outperforms models 13x its size on benchmarks. | Real-time chatbots, cost-sensitive services |
Qwen3-TTS (Beta) | Voice cloning from a 3-second sample. 10 languages including Korean. | Voice AI, multilingual guidance systems |
We'll cover why we chose the Qwen series and dive deeper into each model in our next post. 😄
Get Started Now!
Step1. Create Your API Key
Log in → Click your project → Go to the [API Key] menu
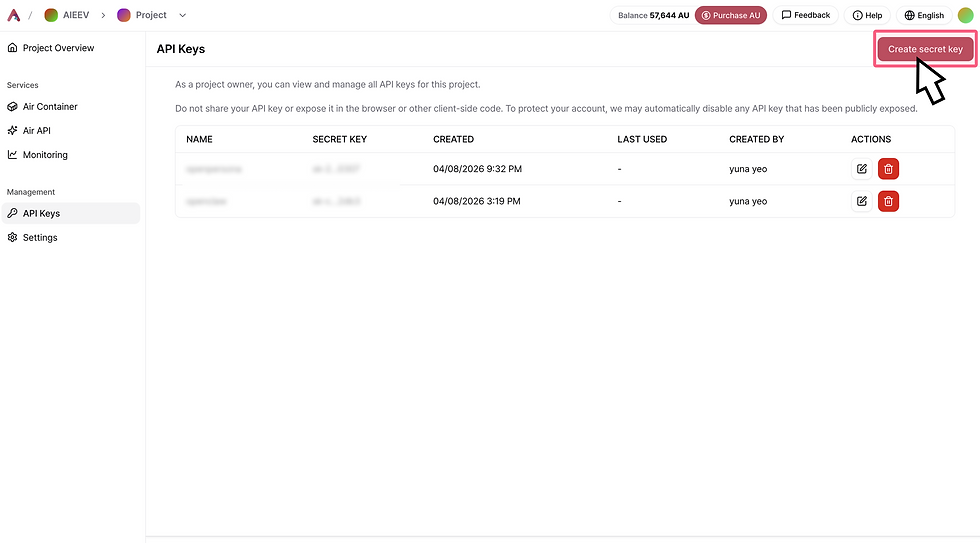
Click Create Secret Key → Select the models and container endpoints the API key can access → Click Create Secret Key

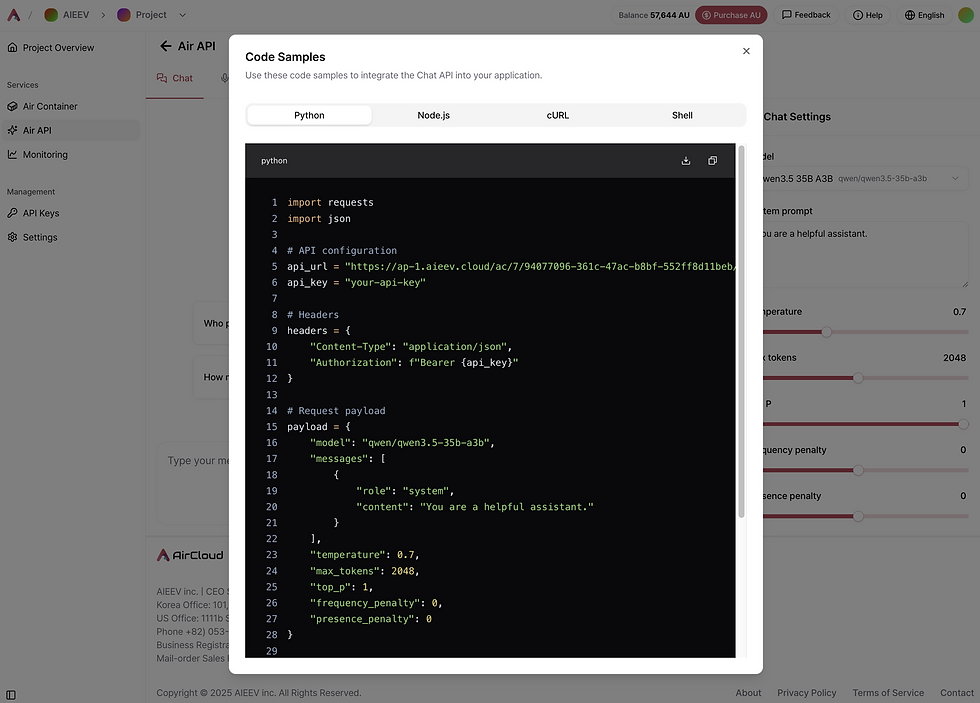
Step2. Make Your First Call
Go to the Air API menu → Select a model or move to the Playground

Click View Code → Copy and use the code (**Paste the generated API key into the api_key = "your-api-key" field in the code and use it.)